jQuery Query Builder: A User-Friendly Way to Build Complex Queries
When it comes to building complex queries for your website or application, things can quickly become overwhelming. That’s where jQuery Query Builder comes in. jQuery Query Builder is a powerful tool that allows you to create and manage complex queries with ease. In this article, we’ll take a closer look at what jQuery Query Builder is and how to use it.
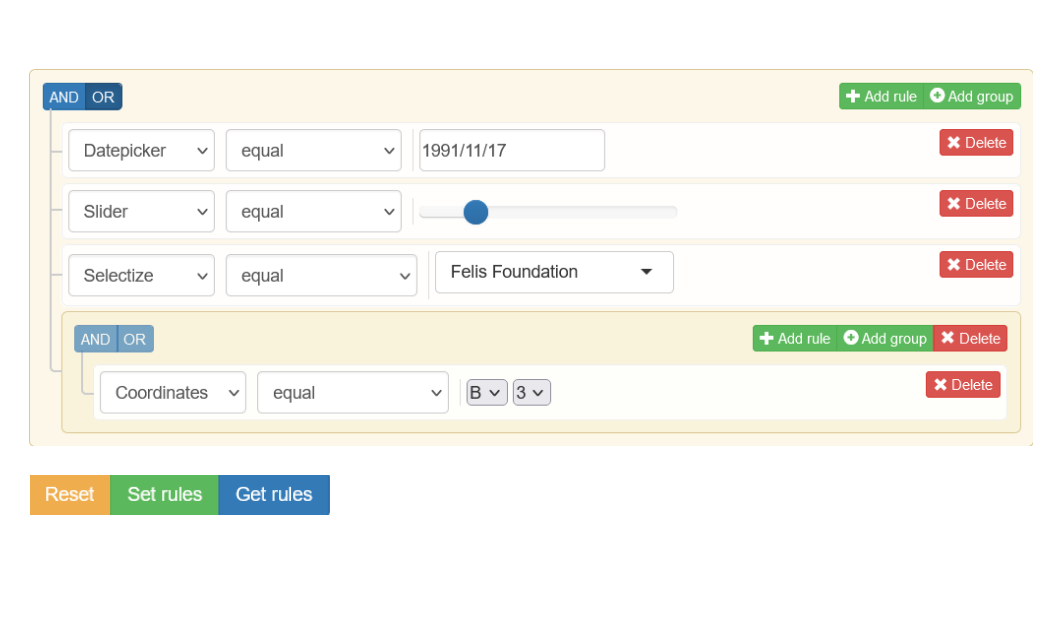
What is jQuery Query Builder?
jQuery Query Builder is a plugin for jQuery that provides a user-friendly interface for building complex queries. With jQuery Query Builder, you can build queries for a variety of data sources, including databases, APIs, and more. The plugin is highly customizable and can be used with any server-side language that supports JSON.
jQuery Query Builder is built on top of jQuery, Bootstrap, and Font Awesome, making it easy to integrate into your existing web applications. The plugin supports a wide range of input types, including text inputs, drop-down menus, date pickers, and more.
How to Use jQuery Query Builder
Using jQuery Query Builder is easy. Here are the steps you need to follow:
Step 1: Install the Plugin
To get started, you’ll need to download and install the jQuery Query Builder plugin. You can download the latest version from the official website or install it using a package manager like npm.
Step 2: Include the Plugin in Your Project
Once you’ve downloaded the plugin, you’ll need to include it in your project. You can do this by adding the following code to the head of your HTML file:
<link rel="stylesheet" href="path/to/css/query-builder.default.min.css">
<script src="path/to/js/jquery.min.js"></script>
<script src="path/to/js/query-builder.standalone.min.js"></script>
Step 3: Create a Query Builder Instance
Next, you’ll need to create a Query Builder instance. You can do this by adding the following code to your JavaScript file:
$('#builder').queryBuilder({
  // Options go here
});
This code initializes a new Query Builder instance and attaches it to the element with the ID “builder”.
Step 4: Add Fields
Once you’ve created a Query Builder instance, you can start adding fields. Fields represent the data sources that you want to query. You can add fields using the following code:
$('#builder').queryBuilder('add', {
  id: 'name',
  label: 'Name',
  type: 'string'
});
This code adds a new field called “Name” that accepts string values.
Step 5: Build Queries
With your fields in place, you can start building queries. jQuery Query Builder provides a variety of operators that you can use to build complex queries. Here’s an example of how to build a simple query:
$('#builder').queryBuilder('setRules', {
  condition: 'AND',
  rules: [{
    id: 'name',
    operator: 'equal',
    value: 'John Doe'
  }]
});
This code sets a rule that the “Name” field must be equal to “John Doe”.
Conclusion
jQuery Query Builder is a powerful tool that simplifies the process of building complex queries. With its user-friendly interface and support for a wide range of data sources, jQuery Query Builder is an excellent choice for any web application that requires advanced query functionality. With just a few lines of code, you can build complex queries that would otherwise take hours to write manually. Give jQuery Query Builder a try today and see how it can help you save time and simplify your development process.